Table of contents Link to heading
- Older Exynos devices (Exynos 4xxx, 542x)
- Slightly newer Exynos devices (Exynos 543x)
- Samsung Galaxy S8+ (Exynos 8895)
- Samsung Chromebook 2 (exynos5420-peach-pit)
- Conclusion and references
On Samsung devices with micro-usb connectors we can get AP (Application Processor) uart by connecting a 619 kOhm resistor between the ID pin and GND on an micro-usb male, as outlined in for example PostmarketOS’s wiki. Only downside with this type of cable is that it is impossible to get UART and at the same time use the usb-port for charging or flashing or something else.
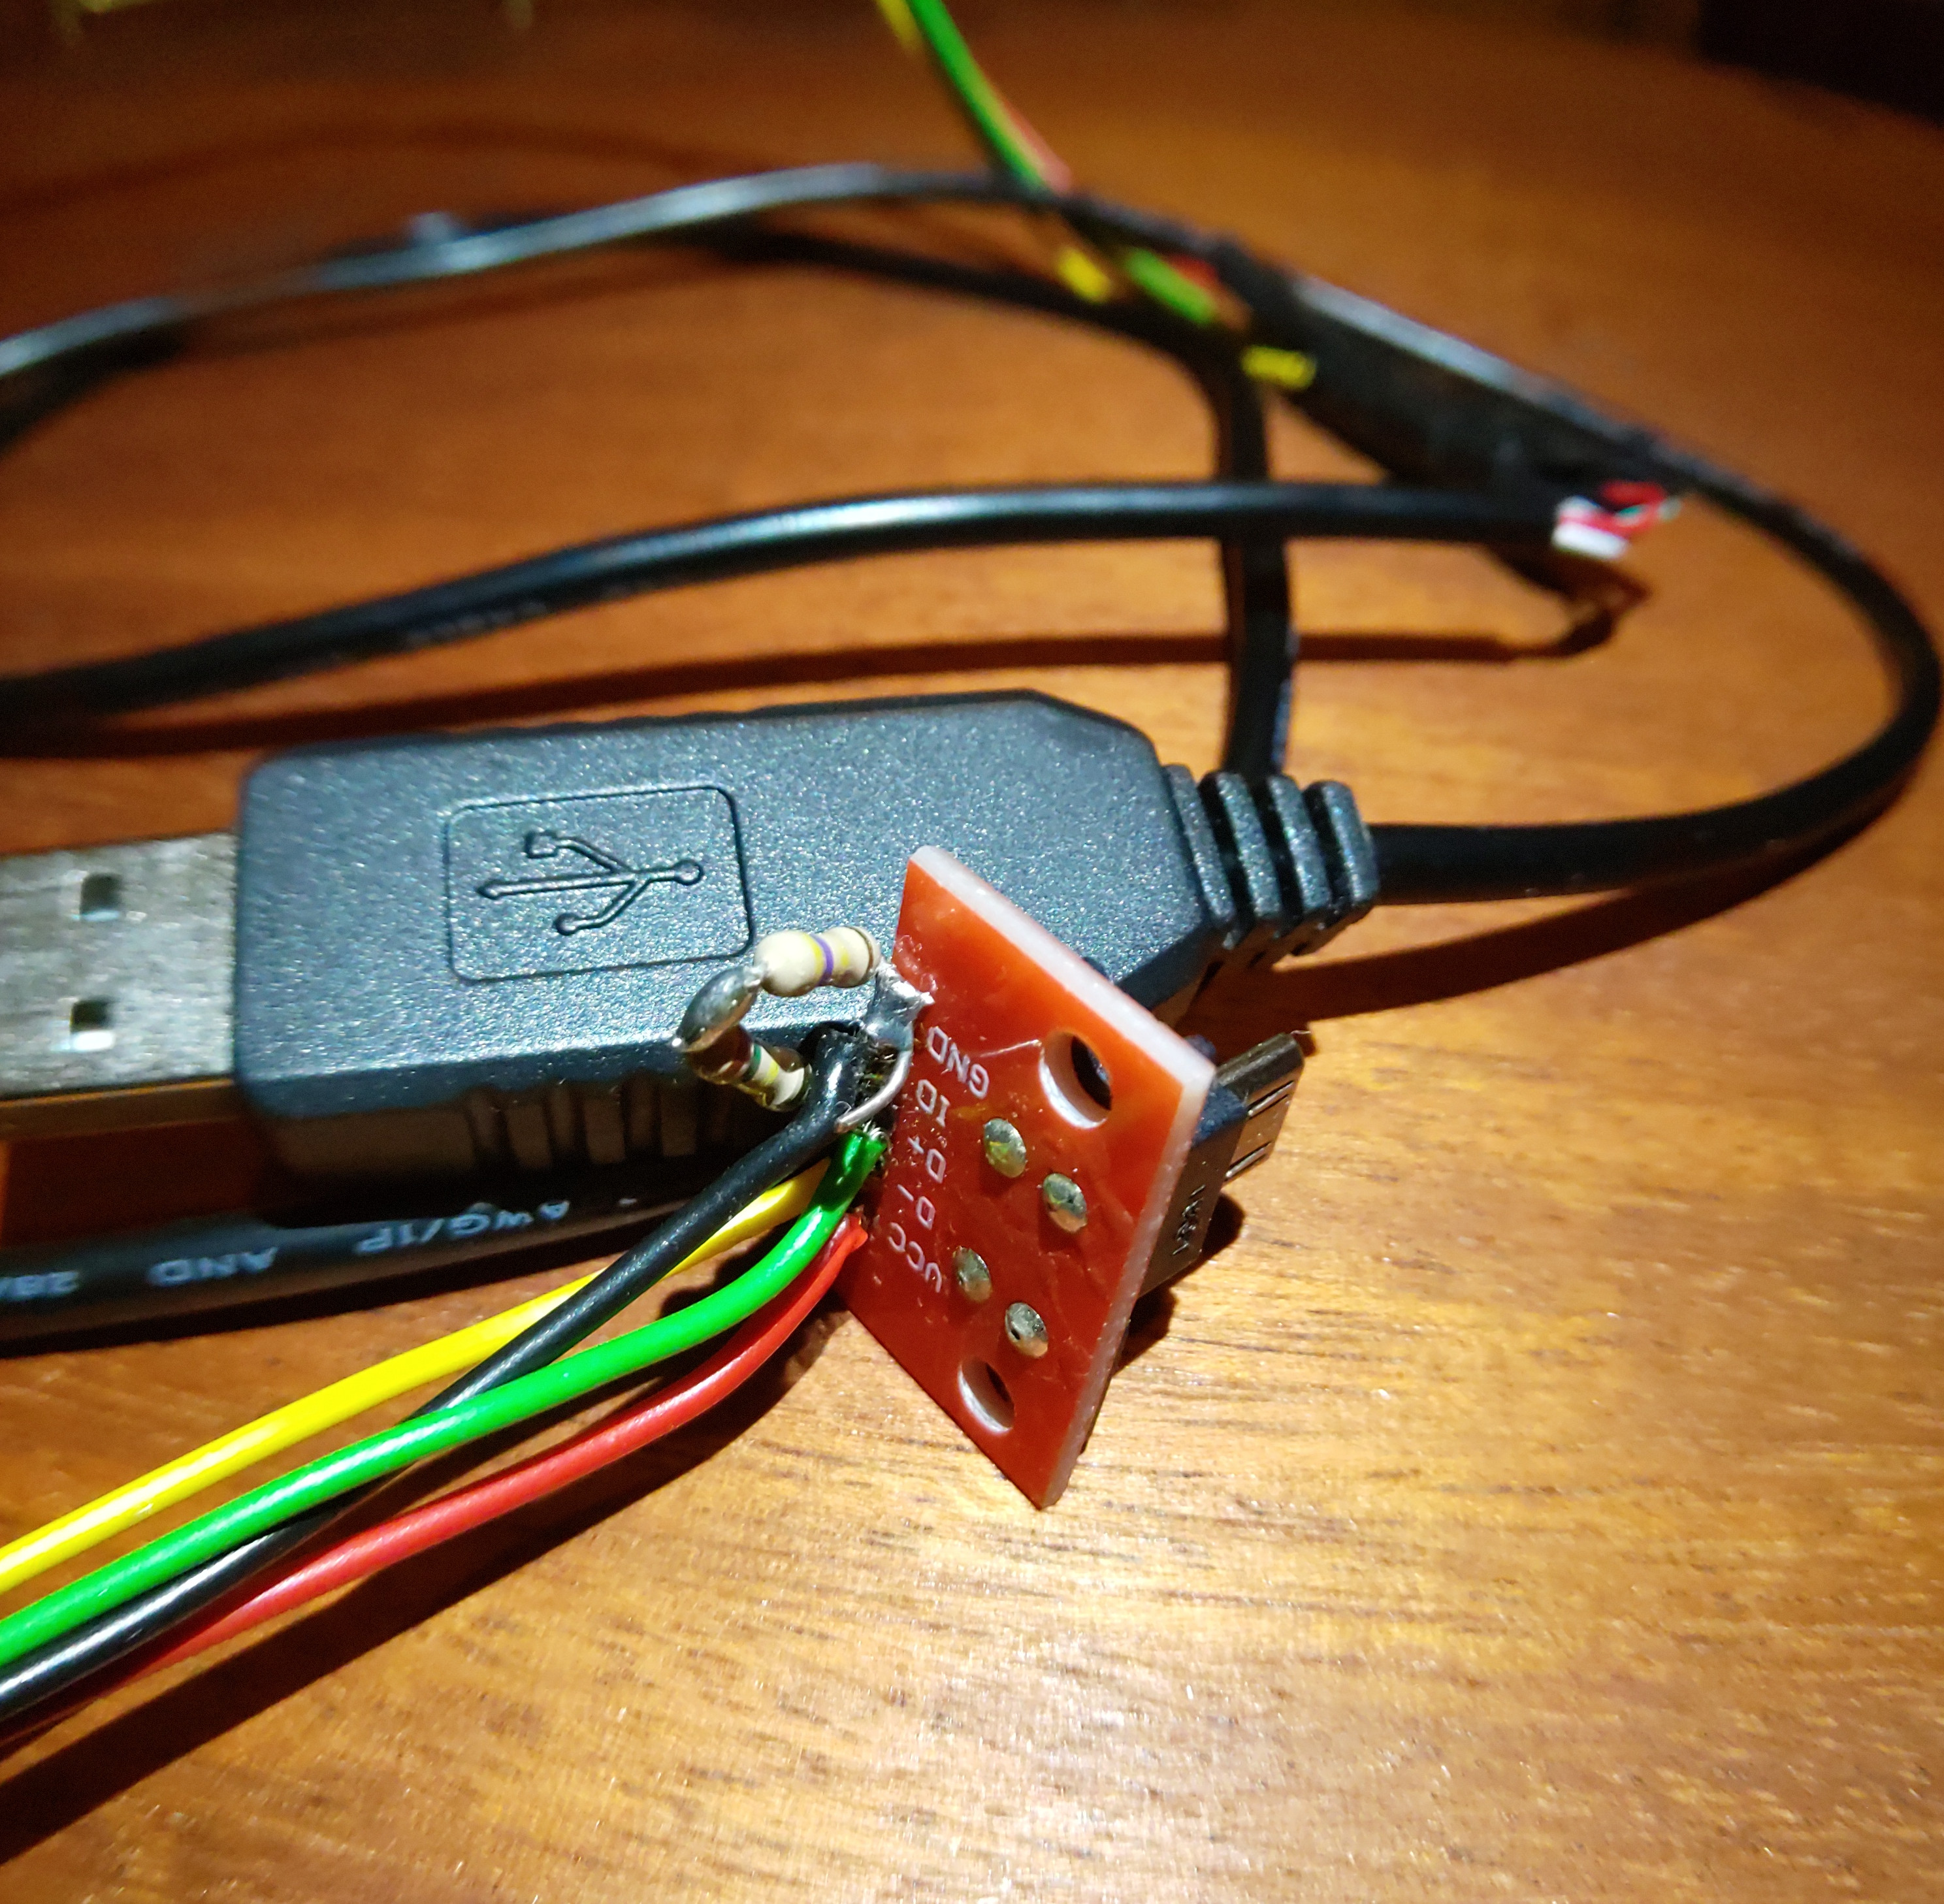
Micro usb male with 619 kOhm between GND and ID, connected to PL2303 1.8V usb-uart adapter
On devices with USB-C connectors it is more complicated: it is believed that 619 kOhm is needed between the B12 pin and GND [1], but some USB-C PD vendor defined messages (VDMs) also needs to be sent [2], and exctly how those work is unknown. An alternative is to force-enable UART by controlling the MUIC, but that requires a custom kernel, or at least some chainloaded intermediate bootloader [3, 4].
On all devices it is possible to get UART instead through pads on the main board of the device, but the pads are tiny and so soldering onto them is difficult. The proper way to connect to these pads would be to solder an Panasonic AXE612124 or AXE620124 connector onto the pads, and then connect a flex cable/board with the matching male connector onto it. I want to design and order some boards to breakout all the signals on these connectors, but I have never designed PCBs before (technically I am a chemist) and since it would be rather expensive I would like to get it as right as possible on the first try. So, I do not want to solder wires onto the pads and butcher them, and ordering proper boards is (for now) out of my safety zone, what can we do instead? Luckily there are probes for accessing test points, one affordable kit is PCBite. Without further ado, let’s summarize initial findings for a few devices.
Older Exynos devices (Exynos 4xxx, 542x) Link to heading
On older devices (for example galaxy s2 (exynos4210-i9100), galaxy s3 (exynos4412-i300), galaxy tab s (exynos5420-chagallwifi) it works as a charm, bootloader is very talkative. On these devices we can always get UART logs by using a special micro usb “JIG” with 619 kΩ between ID and GND, but that has the downside that we hog the micro usb port, we cannot get debug output from the bootloader while for example flashing something through the odin interface. For setting up automatic testing of these devices it is necessary to get logs in some other way, like by connecting to these pads.
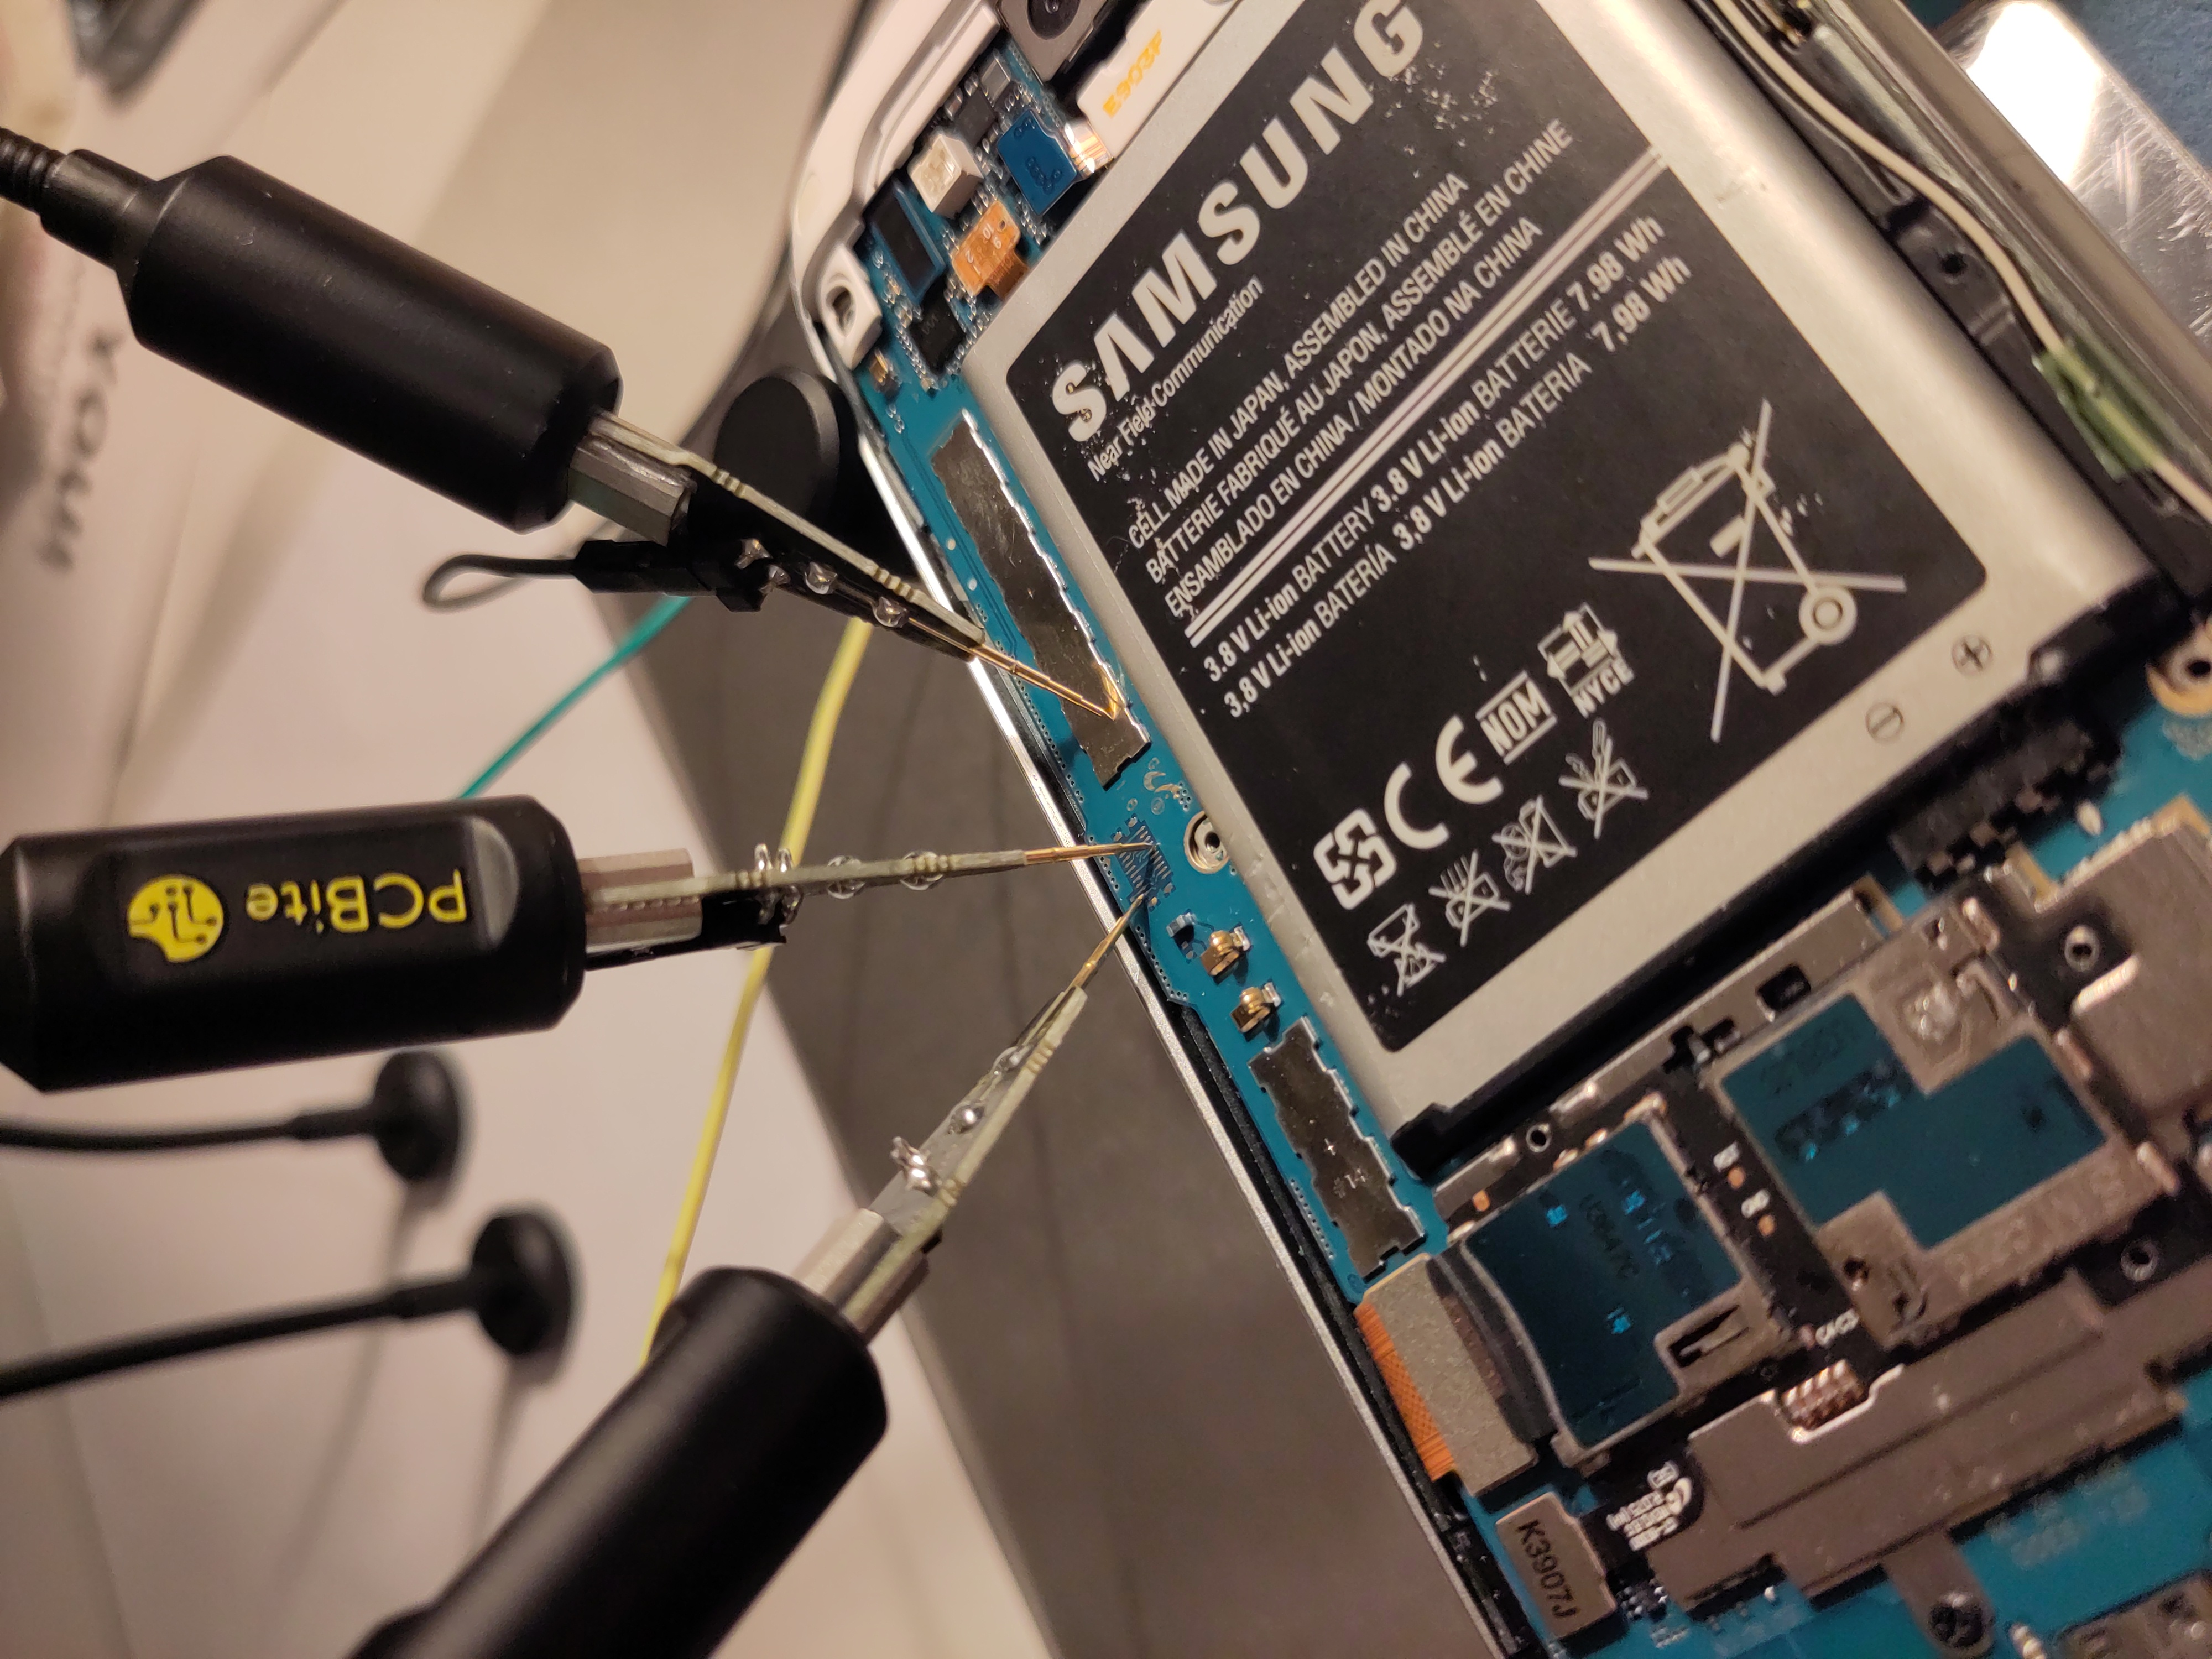
UART pads on galaxy s3
Slightly newer Exynos devices (Exynos 543x) Link to heading
On newer exynos devices the situation is a bit more interesting. On galaxy tab s2 (exynos5433-gts28lte), and probably exynos7xxx devices if my memory serves correctly, bootloader prints everything but when kernel boots all output stops. This happens no matter what we set CMDLINE to, it seems bootloader disables serial in some way before booting kernel. The pads on galaxy tab s2 were hard to access, the tablet has to be fully dissambled to remove middle frame for pads to be visible.
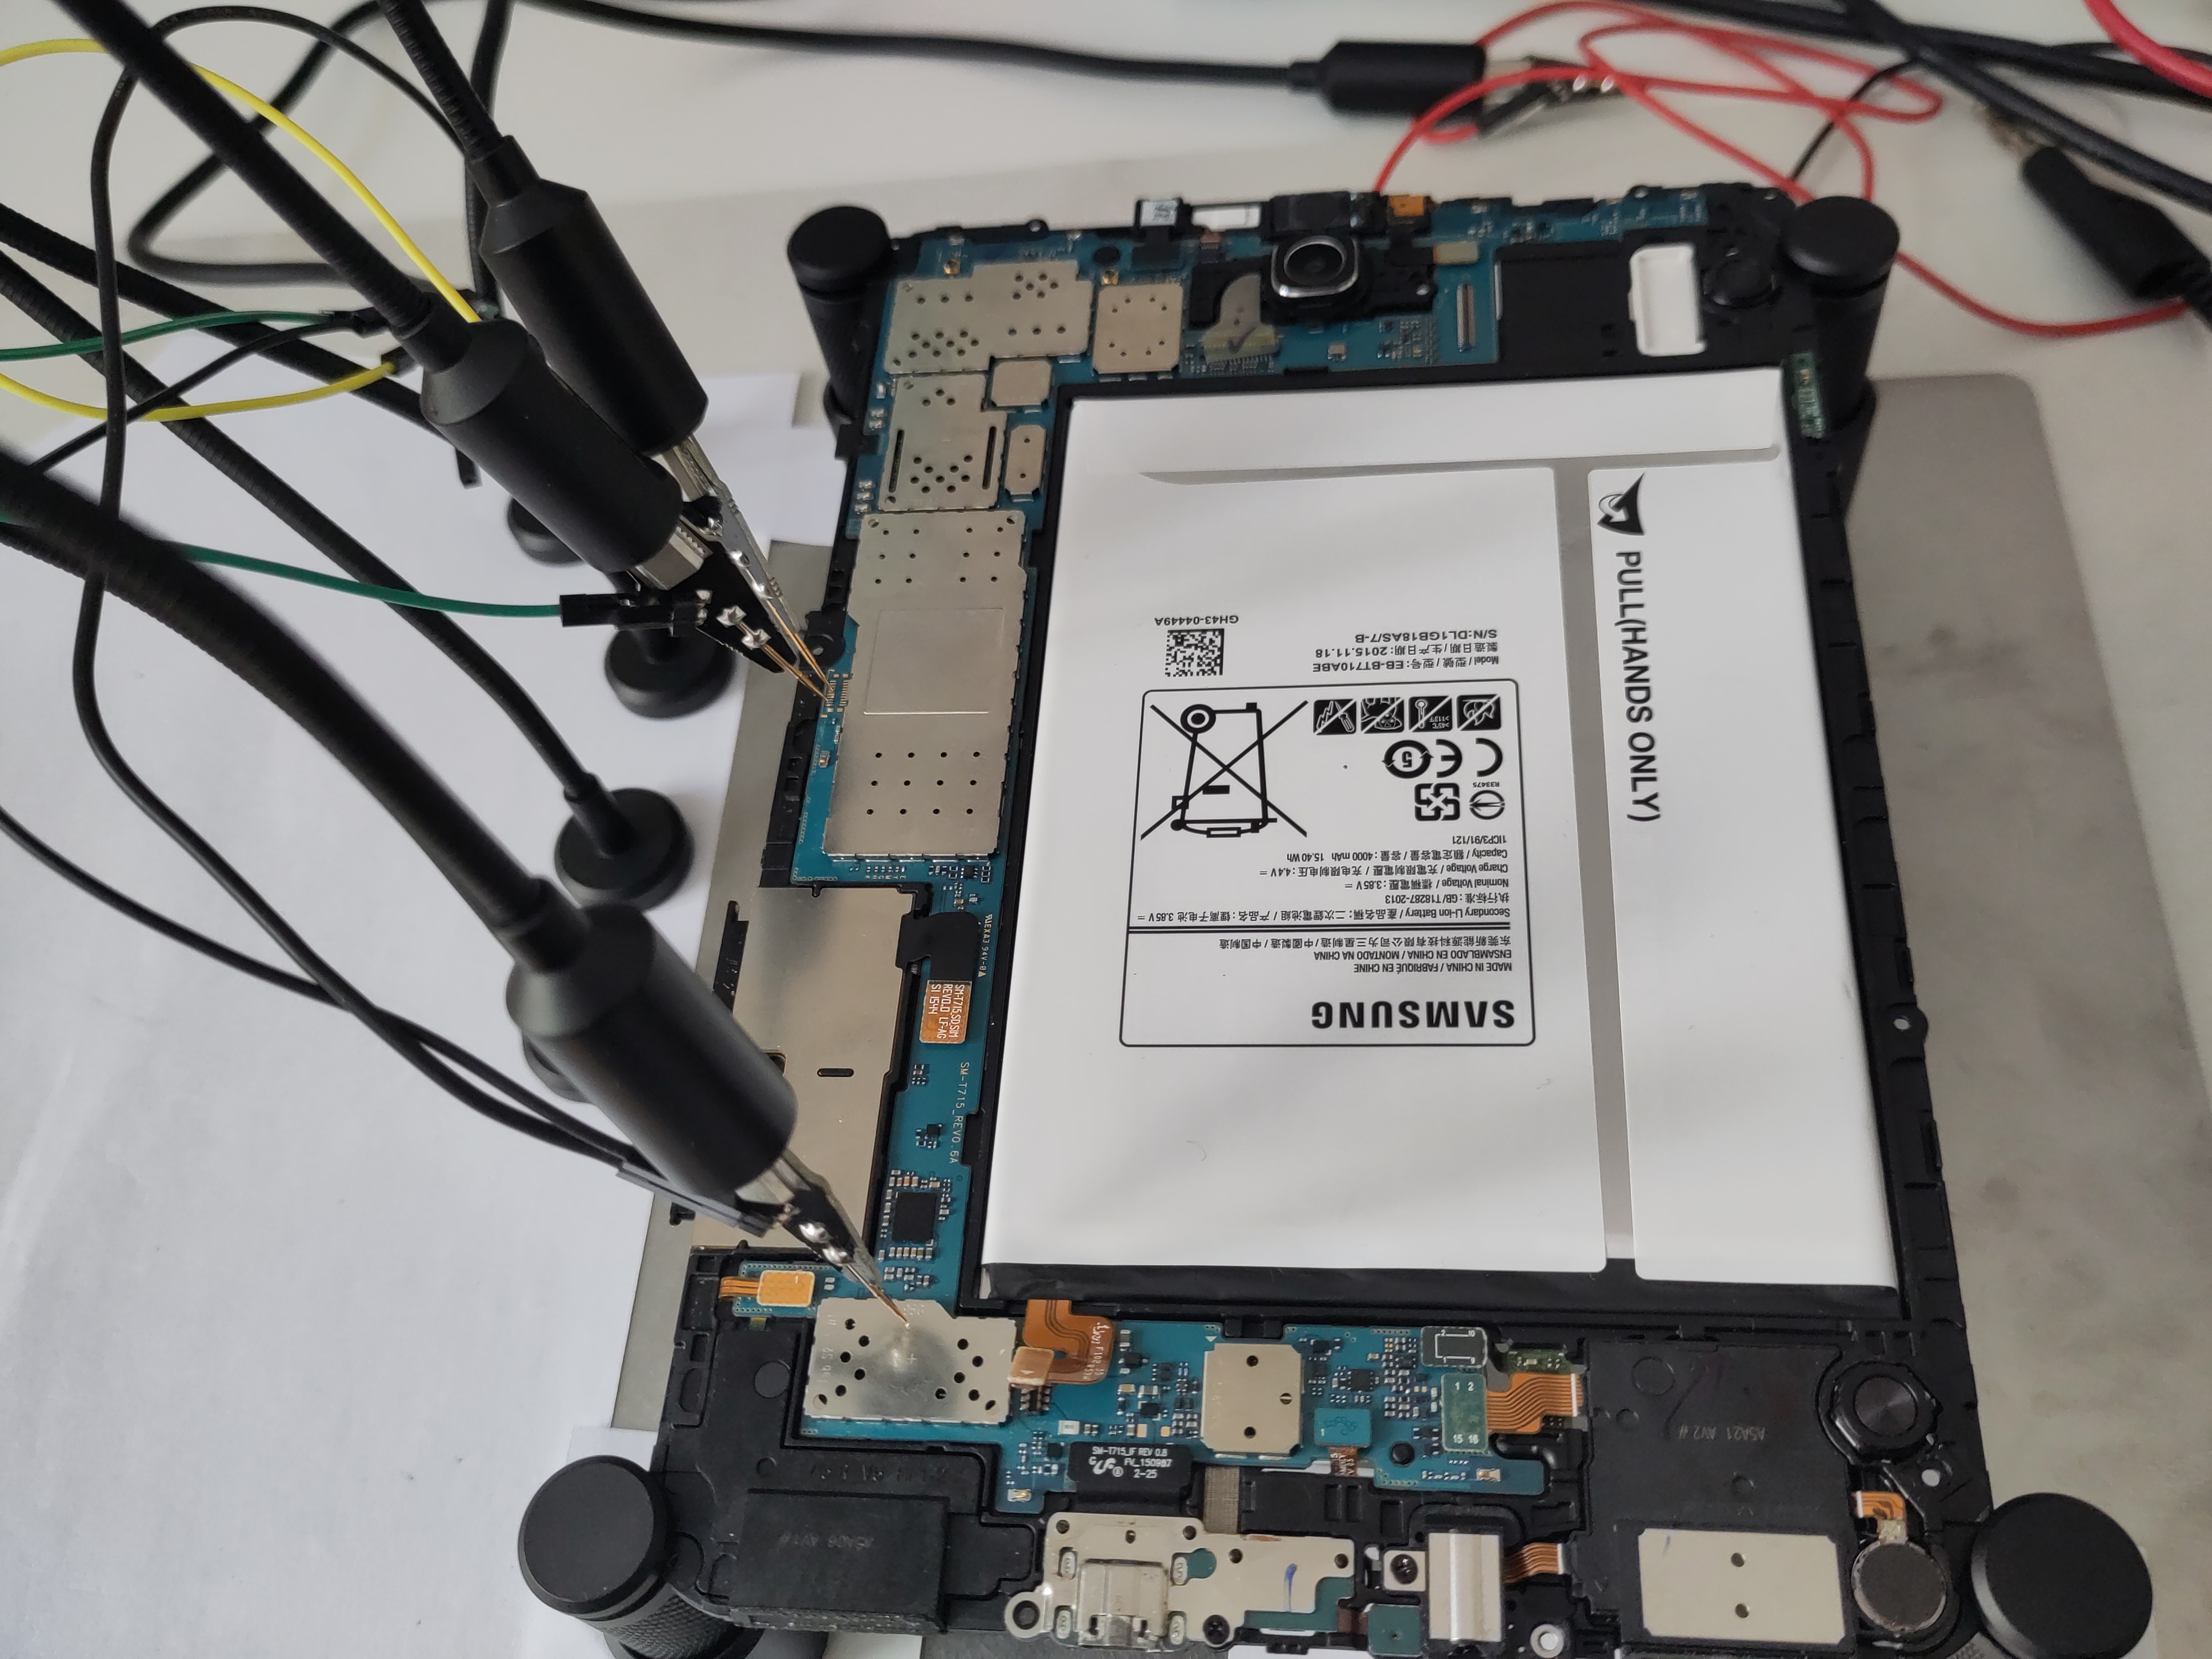
UART pads on galaxy tab s2 8.0"
Samsung Galaxy S8+ (Exynos 8895) Link to heading
On galaxy s8+ the UART pads are covered by solder mask, to access the pads we first have to scrape of the coating.
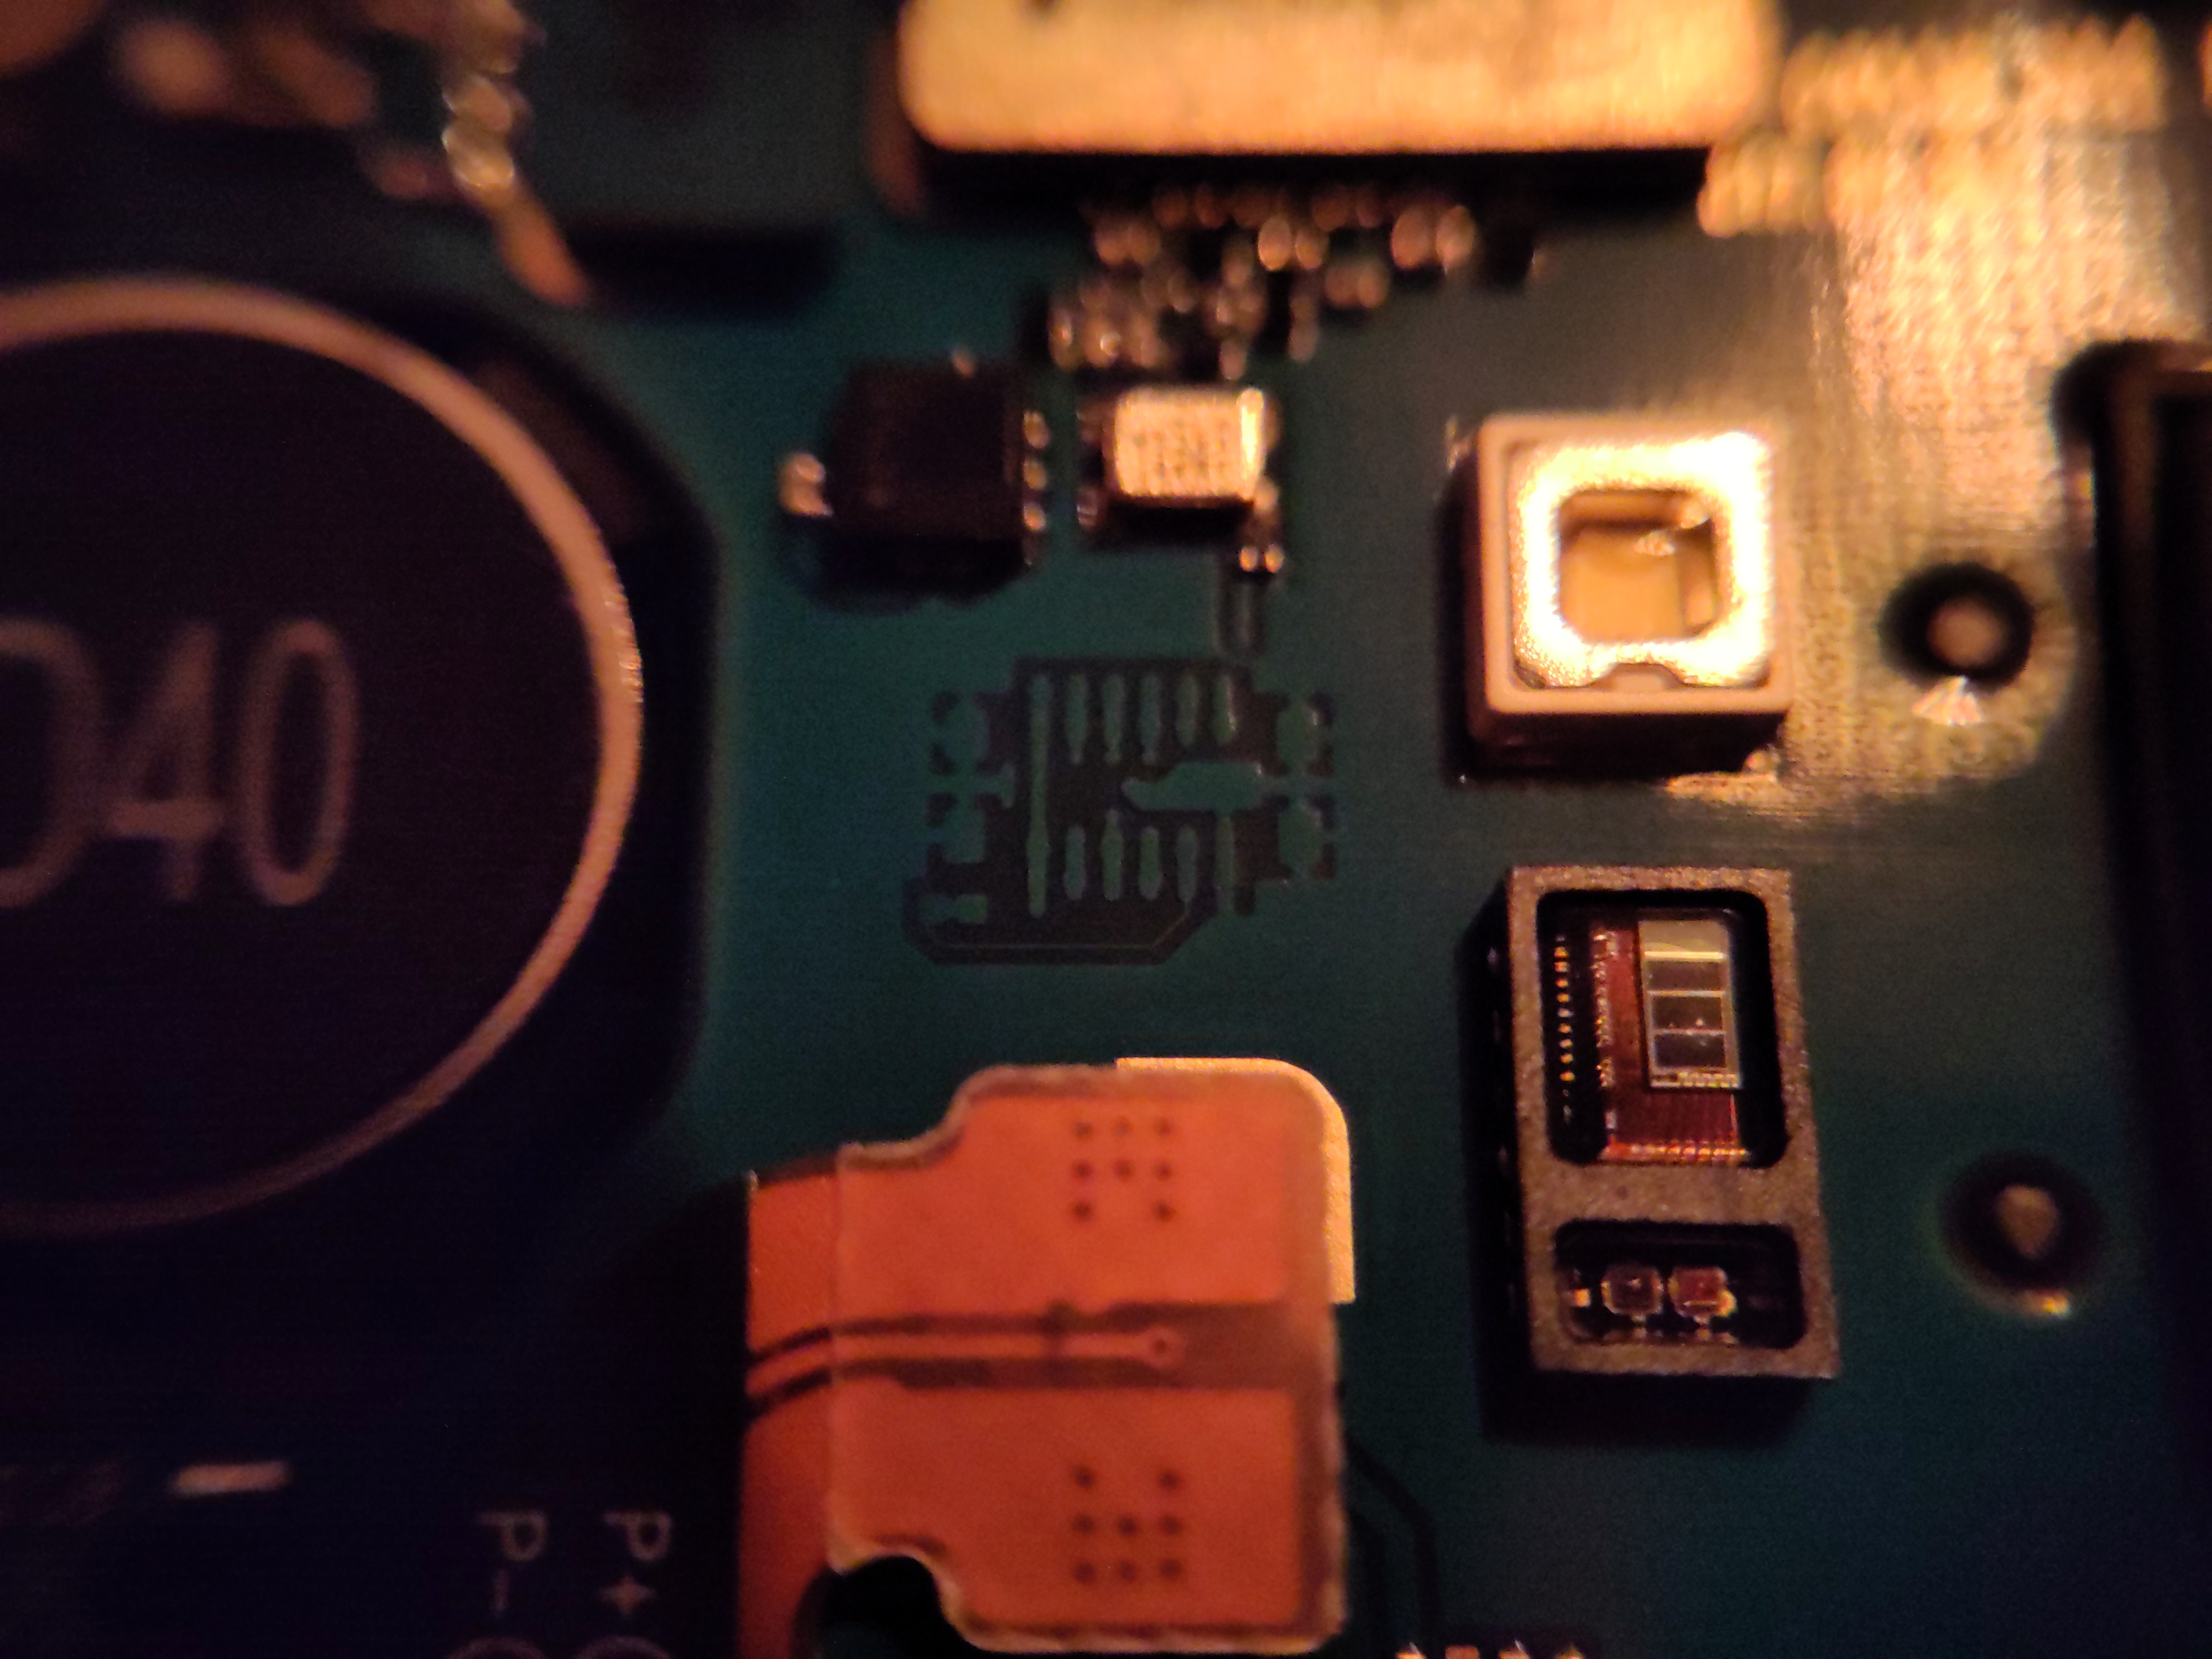
Solder mask on debug pads on galaxy s8+
The bootloader disables serial quite early, we just get around 50 lines before output stops:
[0:  435]
[0:  436] Samsung S-Boot 4.0 for SM-G955N (Apr 18 2018 - 11:49:49 17805229)
[0:  443] EXYNOS8895 EVT 1.1 (Base on ARM CortexA53)
[0:  447] 6144MB / 0MB / Rev 10 / G955NKSU1CRD7 / (PKG_ID 0x2e087022) / LOT_ID NBY6A / SHIP /SW_RST (0x20000000)
[0:  458] MON: 0x42(0)
[0:  460] MON[0] = (0)[0x31, 0x46]
[0:  463] MON[1] = (1)[0x19, 0x9c]
[0:  466] MON[2] = (2)[0x26, 0xdc]
[0:  469] MON[3] = (3)[0x14, 0x44]
[0:  472] MON[4] = (4)[0x12, 0x04]
[0:  475] MON[5] = (5)[0x11, 0x45]
[0:  479] MON[6] = (6)[0x77, 0x80]
[0:  482] MON[7] = (7)[0x0f, 0x00]
[0:  494] MAX77865 RESET.
[0:  498] ccic_register_s2mm005:
[0:  501] ccic_is_s2mm005:
[0:  506] ccic_is_s2mm005: retry:2 rid:7 ret:0
[0:  516] S2MM005 boot:0x 7 main:0x43
[0:  525] S2MM005 swver2:  0  0  0  0
[0:  536] s2mm005 found.ret:66
[0:  539] muic_register_max77854_apis
[0:  547] muic_is_max77854 chip_id:0x65 muic_id:0x65 -> mismatched.
[0:  553] Not a max77854 MUIC.
[0:  555] muic_register_max77865_apis
[0:  563] muic_is_max77865 chip_id:0x65 muic_id:0x65 -> matched.
[0:  569] [MUIC] print_init_regs
[0:  580]  INT:10 88 00 02 ST:c0 00 e0 IM:0f ff ff fd CCDET:10 BCCTRL:c5 00 CTRL:3f 00 20 30 HVCT:00 00 TOPCTRL:02
[0:  625]
[0:  628] MUIC rev = MAX77865(02)
[0:  631] init_multi_microusb_ic Active MUIC 0x65
[0:  642] max77865_init_microusb_ic: CCDET: 0x10 -> 0x00
[0:  659] [MUIC] chgdet runnig, retry after 100msec
[0:  770] mach_board_initialize: Active ccic device.
[0:  777] ifconn_init: CCIC Mode
[0:  779] ccic_wait_auth:
[0:  790] S2MM005 version: hw: 6 boot: 7 main:43
[0:  800] S2MM005 hwver2:  0  0  0  0
[0:  806] ccic_read_adc:
[0:  808] s2mm005_read_adc:
[0:  813] s2mm005_read_adc: RID = 07(RID_OPEN)
[0:  817] board_ccic_check_uart: jig_adc=c0, cc_adc=07
[0:  822] ccic_read_adc:
[0:  824] s2mm005_read_adc:
[0:  829] s2mm005_read_adc: RID = 07(RID_OPEN)
[0:  833] MMU: enable start
[0:  837] MMU: enable done
[0:  839] ifconn_get_jig_status: CCIC Mode
[0:  843] ccic_read_adc:
[0:  845] s2mm005_read_adc:
[0:  849] s2mm005_read_adc: RID = 07(RID_OPEN)
[0:  853] ifconn_is_ccic_jig_device: rid=07
However, we can still send stuff (just not get any confirmation back that it works), so by mashing enter during boot we can get to SBOOT shell, and from there modify CMDLINE before booting kernel with:
setenv CMDLINE earlycon console=/dev/ttySAC0 loglevel=7
saveenv
load_kernel
boot
This modifies CMDLINE permanently, so on future boots kernel will print output to serial0.
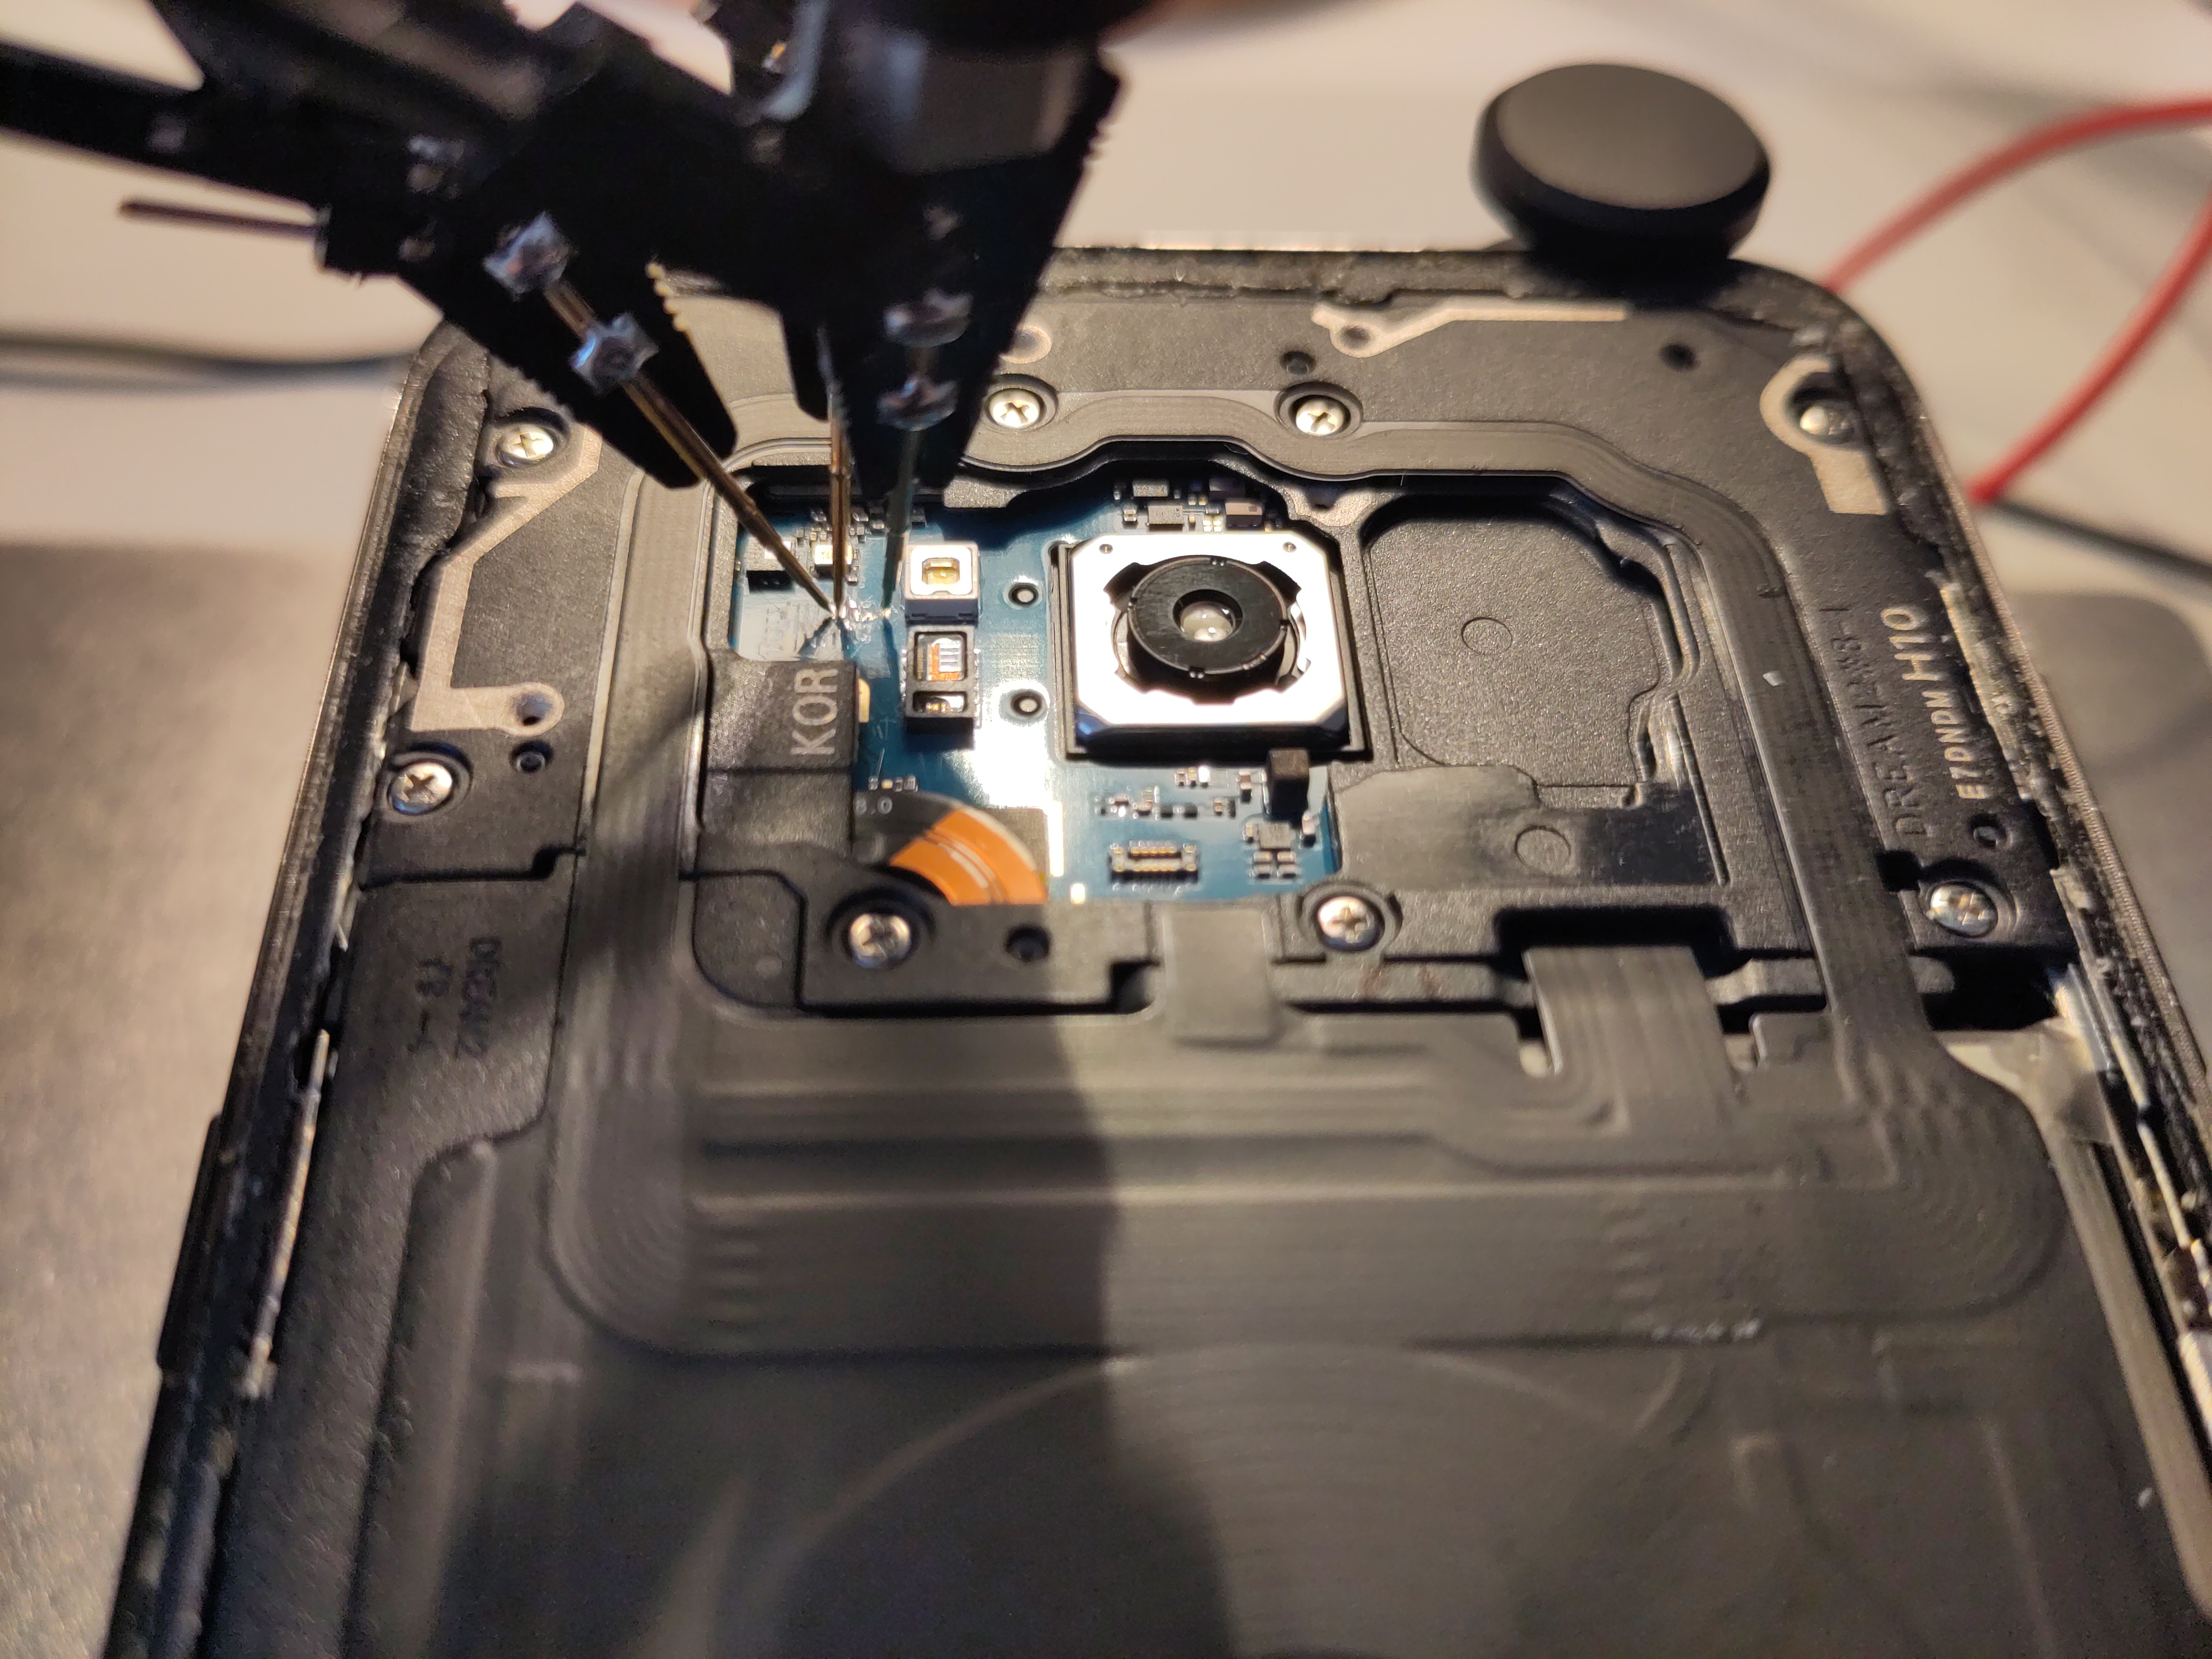
UART pads on galaxy s8+
Samsung Chromebook 2 (exynos5420-peach-pit) Link to heading
On Samsung Chromebook 11.6" (exynos5420-peach-pit) google really has not made it easy for us to get UART. The debug connector is documented [5], so after removing the backcover we can access UART on the debug connector pads. We find not only the AP UART here, but also embedded controller (EC) UART. On HP Chromebook 11 (exynos5250-spring), De7ec7ed accessed and documented both UARTs [6, 7].

Servo V2 debug pads on exynos5420-peach-pit
HOWEVER, for peach-pit AP UART does not print anything unless we also
close two solder bridges that are hidden under the heatsink, and to
remove the heatsink we have to fully disconnect the main board and
flip it over to unscrew the heat sink screws. After closing those we
can get UART. The bootloader and kernel are dead silent (except for a
Uncompressing Linux... done, booting the kernel. message when
booting vendor kernel), but getting to a getty shell works fine,
indicating that these pads are correct ones.
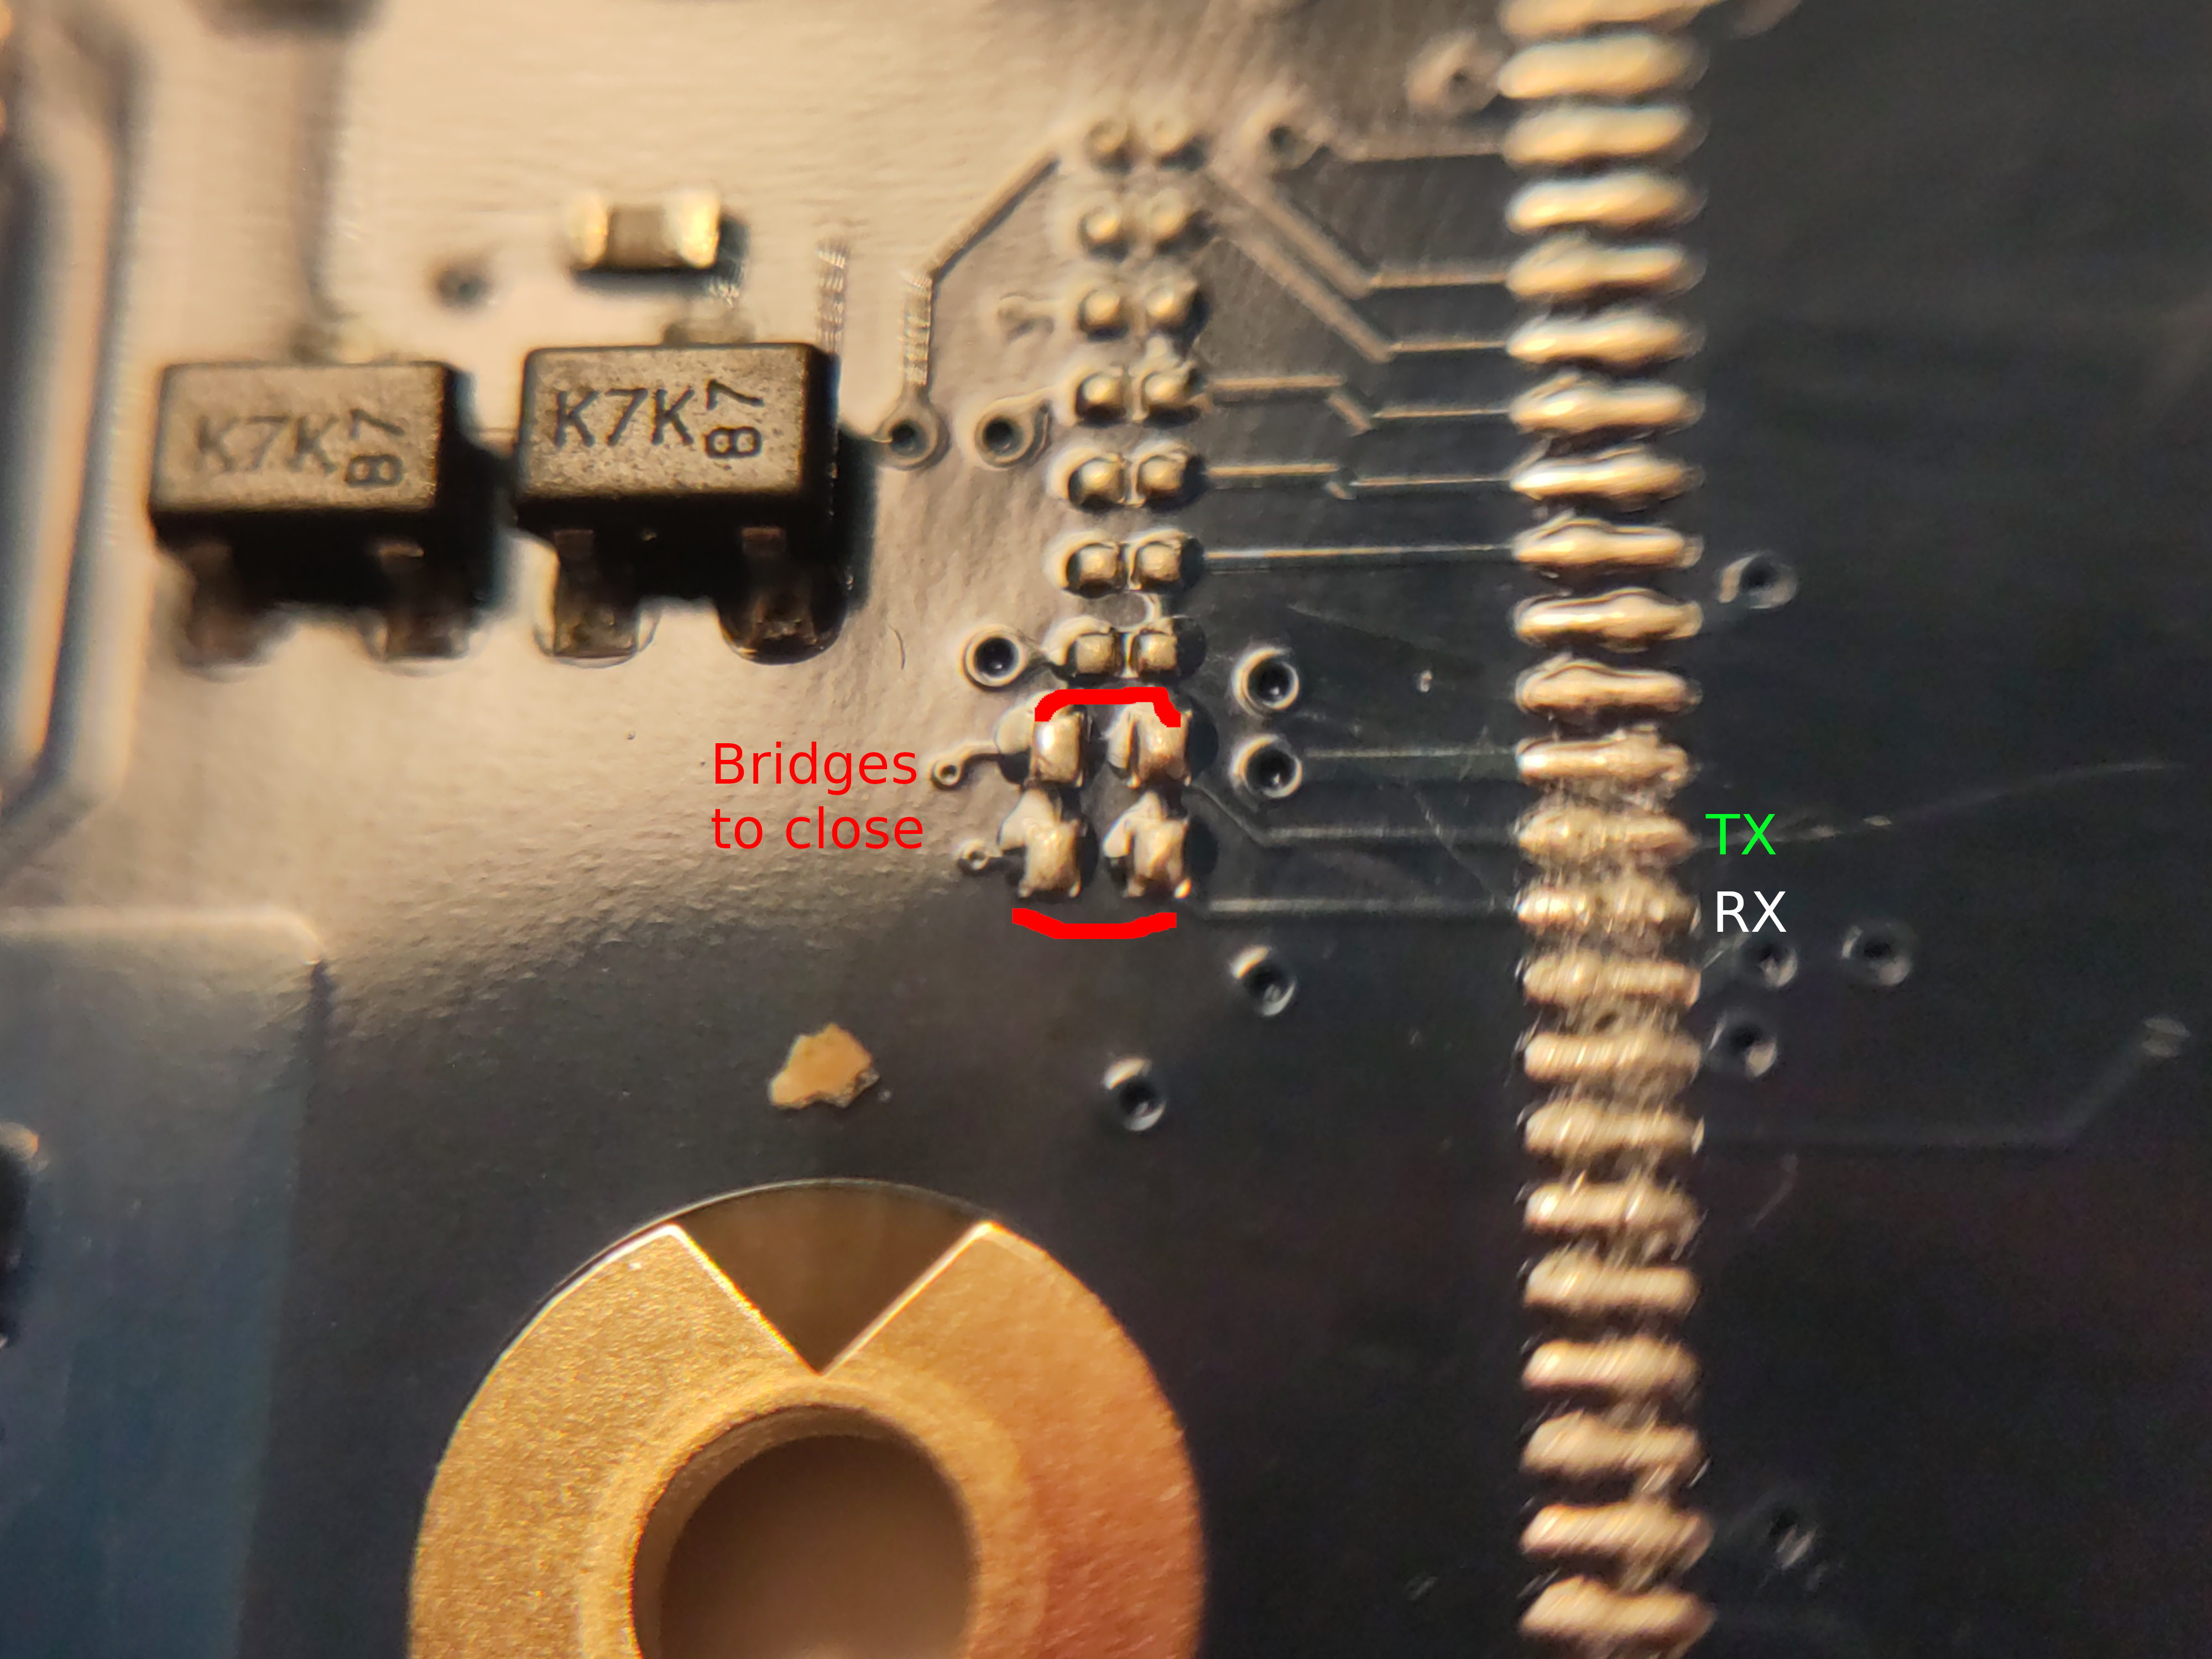
Bridges to close to get UART on exynos5420-peach-pit
Conclusion and references Link to heading
That will be the end of this post, pretty sure there will be more interesting findings in the near future!
[2] Alendal, G., Axelsson, S., & Dyrkolbotn, G.O. (2019). Exploiting Vendor-Defined Messages in the USB Power Delivery Protocol. IFIP Int. Conf. Digital Forensics.
[3] https://github.com/VDavid003/minimal_sboot_wrapper
[4] https://github.com/dsankouski/u-boot/commit/b07922036640203cac450cbc704c5606e9385da3
[5] https://www.chromium.org/chromium-os/servo/810-10010-03_20120227_servo_SCH_0.pdf (Page 13 and 14)
[6] http://www.de7ec7ed.com/2013/05/application-processor-ap-uart-samsung.html
[7] http://www.de7ec7ed.com/2013/05/embedded-controller-ec-uart-samsung.html